If you're a dessert lover, chances are you've heard of Oreo cookie crust. This versatile and easy-to-make crust has become a staple in the world of baking, offering a rich, chocolatey base for a variety of sweet treats. Whether you're preparing a cheesecake, pie, or even a no-bake dessert, an Oreo cookie crust can elevate your creation to the next level. In this article, we will explore everything you need to know about making the perfect Oreo cookie crust, from its origins to step-by-step instructions, tips, and variations. Not only will you learn how to create this delicious crust, but you'll also discover why it has become a favorite among bakers and dessert enthusiasts worldwide. So, let's dive in and uncover the secrets behind this delectable treat!
Oreo cookies have been a household name for decades, known for their creamy filling sandwiched between two chocolate wafers. While they are delicious on their own, their versatility in baking has made them a go-to ingredient for many dessert recipes. One of the most popular uses of Oreos in baking is creating a cookie crust. This crust is not only simple to prepare but also adds a unique texture and flavor to any dessert. Its crunchy yet crumbly texture pairs perfectly with creamy fillings, making it a match made in dessert heaven.
In this comprehensive guide, we will walk you through everything you need to know about Oreo cookie crusts. From the ingredients and tools you'll need to step-by-step instructions, tips for success, and creative variations, this article has got you covered. Whether you're a seasoned baker or a beginner looking to try something new, this guide will equip you with the knowledge and confidence to create a flawless Oreo cookie crust every time. Let's get started!
Read also:Kevin Spacey Mother A Deep Dive Into Her Life And Influence
Table of Contents
What is an Oreo Cookie Crust?
An Oreo cookie crust is a simple yet delicious base used in a variety of desserts, including cheesecakes, pies, and tarts. It is made by crushing Oreo cookies into fine crumbs and mixing them with a binding agent, typically melted butter. This mixture is then pressed into a baking pan to form a sturdy and flavorful crust that complements the dessert's filling.
The beauty of an Oreo cookie crust lies in its simplicity and versatility. Unlike traditional pie crusts that require rolling and shaping dough, an Oreo crust can be prepared in minutes with minimal effort. Its rich chocolate flavor and crunchy texture make it a favorite among bakers and dessert lovers alike. Whether you're making a classic cheesecake or experimenting with a no-bake dessert, an Oreo cookie crust is sure to impress.
Ingredients and Tools You'll Need
Before you begin making your Oreo cookie crust, it's important to gather all the necessary ingredients and tools. Here's a list to help you get started:
Ingredients
- 1 package of Oreo cookies (about 20-24 cookies)
- 4-6 tablespoons of melted butter (unsalted is preferred)
- Optional: 1-2 tablespoons of sugar (if you prefer a sweeter crust)
Tools
- Food processor or blender (for crushing the cookies)
- Mixing bowl
- Spoon or spatula
- 9-inch pie pan or springform pan
- Parchment paper (optional, for easy removal)
With these ingredients and tools on hand, you'll be ready to create a perfect Oreo cookie crust in no time.
Step-by-Step Guide to Making an Oreo Cookie Crust
Making an Oreo cookie crust is a straightforward process that requires just a few simple steps. Follow this guide to ensure your crust turns out perfectly every time.
Step 1: Prepare the Oreo Cookies
Begin by removing the creamy filling from the Oreo cookies. While some recipes suggest leaving the filling intact, removing it ensures a more consistent texture and flavor. You can use a knife or your fingers to scrape off the filling.
Read also:Dezi Arnaz Jr A Comprehensive Look Into The Life And Legacy Of A Rising Star
Step 2: Crush the Cookies
Place the Oreo cookies in a food processor or blender and pulse until they are finely crushed. If you don't have a food processor, you can place the cookies in a resealable plastic bag and crush them with a rolling pin or the back of a spoon. Aim for a fine, sandy texture.
Step 3: Mix with Melted Butter
In a mixing bowl, combine the crushed Oreo cookies with melted butter. Start with 4 tablespoons of butter and add more as needed until the mixture resembles wet sand. The butter acts as a binding agent, holding the crumbs together and creating a sturdy crust.
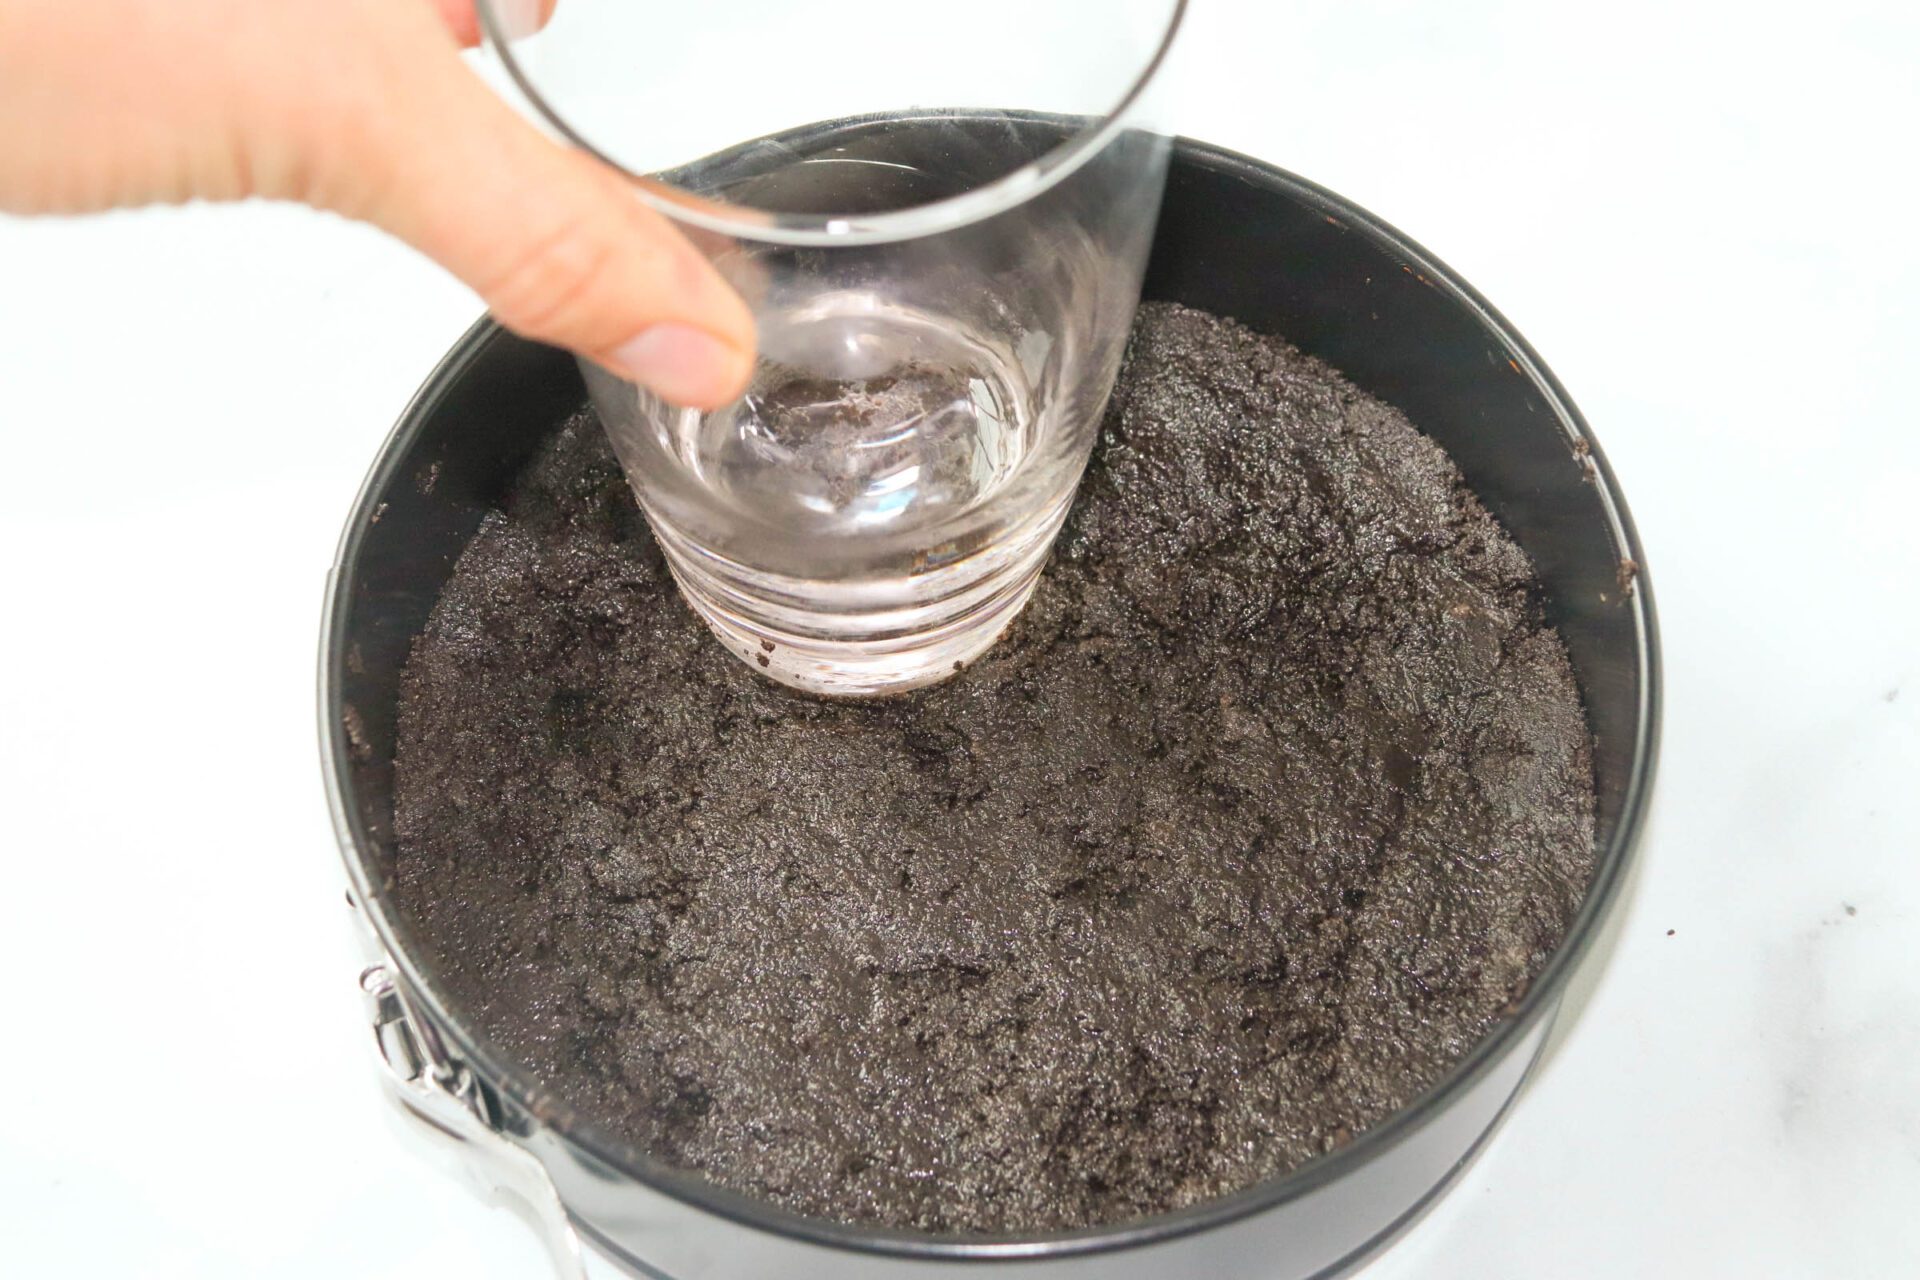
Step 4: Press into the Pan
Transfer the mixture to a 9-inch pie pan or springform pan. Use the back of a spoon or a flat-bottomed glass to press the crumbs firmly into the bottom and up the sides of the pan. Ensure the crust is evenly distributed and compacted to prevent crumbling when sliced.
Step 5: Chill or Bake
If you're making a no-bake dessert, chill the crust in the refrigerator for at least 30 minutes to firm it up. For baked desserts, pre-bake the crust at 350°F (175°C) for 8-10 minutes to set it before adding the filling.
Tips for Success
Creating a flawless Oreo cookie crust requires attention to detail. Here are some tips to help you achieve the best results:
- Use High-Quality Oreos: While any brand of chocolate sandwich cookies will work, using authentic Oreo cookies ensures the best flavor and texture.
- Remove the Filling: For a more consistent texture, take the time to remove the creamy filling from the cookies.
- Don't Overdo the Butter: Too much butter can make the crust greasy and prone to crumbling. Add it gradually and stop when the mixture resembles wet sand.
- Chill Before Adding Filling: Chilling the crust helps it hold its shape and prevents it from becoming soggy when the filling is added.
- Experiment with Add-Ins: For a unique twist, try adding cocoa powder, cinnamon, or finely chopped nuts to the crust mixture.
Creative Variations to Try
While a classic Oreo cookie crust is delicious on its own, there are countless ways to customize it to suit your taste. Here are some creative variations to inspire you:
1. Peanut Butter Oreo Crust
Substitute 2 tablespoons of melted butter with creamy peanut butter for a rich, nutty flavor.
2. Mint Chocolate Crust
Add 1 teaspoon of peppermint extract to the crust mixture for a refreshing twist.
3. Chocolate Hazelnut Crust
Mix in 2 tablespoons of Nutella for a decadent, hazelnut-infused crust.
4. Cinnamon Sugar Crust
Sprinkle 1 teaspoon of ground cinnamon and 1 tablespoon of granulated sugar into the mixture for a warm, spiced flavor.
Common Mistakes to Avoid
Even experienced bakers can make mistakes when preparing an Oreo cookie crust. Here are some common pitfalls to watch out for:
- Skipping the Chilling Step: Failing to chill the crust can result in a crumbly texture that falls apart when sliced.
- Overfilling the Pan: Avoid pressing too much crust mixture into the pan, as this can make it difficult to add the filling.
- Not Compacting Enough: A loosely pressed crust may not hold together well, especially in no-bake desserts.
- Using Salted Butter: Salted butter can alter the flavor of the crust. Opt for unsalted butter for better control over the taste.
Nutrition Information
While Oreo cookie crusts are undeniably delicious, it's important to be mindful of their nutritional content. Here's a breakdown of the approximate nutritional values per serving (based on a 9-inch crust divided into 8 slices):
- Calories: 150
- Total Fat: 8g
- Saturated Fat: 4g
- Cholesterol: 15mg
- Sodium: 120mg
- Total Carbohydrates: 18g
- Sugar: 10g
- Protein: 2g
For a healthier alternative, consider using reduced-fat Oreos or substituting part of the butter with unsweetened applesauce.
A Brief History of Oreo Cookies
Oreo cookies were first introduced by the National Biscuit Company (now Nabisco) in 1912. Originally called "Oreo Biscuits," these cookies quickly gained popularity for their unique combination of chocolate wafers and creamy filling. Over the years, Oreos have become one of the best-selling cookies in the world, inspiring countless recipes and innovations in baking.
Here's a quick look at some key milestones in Oreo's history:
| Year | Milestone |
|---|---|
| 1912 | Oreo cookies are introduced to the market. |
| 1921 | The name "Oreo" is officially trademarked. |
| 1952 | The iconic embossed design is added to the cookies. |
| 1997 | Oreo becomes the world's best-selling cookie. |
Delicious Recipes Featuring Oreo Cookie Crusts
Now that you know how to make a perfect Oreo cookie crust, it's time to put it to use! Here are some mouthwatering recipes to try:
1. Classic Oreo Cheesecake
Top your Oreo crust with a creamy cheesecake filling and garnish with whipped cream and extra Oreo crumbs for a show-stopping dessert.
2. No-Bake Oreo Pie
Combine the crust with a simple filling made from cream cheese, whipped cream, and crushed Oreos for a quick and easy treat.
3. Oreo Ice Cream Cake
Layer the crust with vanilla ice cream, hot fudge, and more crushed Oreos for a decadent frozen dessert.
Conclusion
An Oreo cookie crust is a versatile and delicious foundation for a wide range of desserts. Whether you're a seasoned baker or a beginner, this easy-to-make crust is sure to become a staple in your kitchen. By following the tips and techniques outlined in this guide, you can create a flawless Oreo cookie crust every time and experiment with creative variations to suit your taste.
We hope this article has inspired you to try making your own Oreo cookie crust and explore the endless possibilities it offers. Don't forget to share your creations with friends and family, and leave a comment below to let us know how your baking adventure turned